Device Testing
Getting Started
The guide below assumes some knowledge or running android projects locally using Android Studio.
As a minimum you will need Android Studio installed, and a virtual or physical device connected. More information can be found in the Android Studio Documentation
You will also need to populate a relevant google-services.json file, available from project admin.
Running on a device
In order to run a local app on a native (or emulator) device with live-reload support both the device and local server need custom configuration.
Create a file at apps/picsa-apps/app-native/.env.local and provide a SERVER_URL to match your local ipv4 address for the angular server.
This should usually be in the form: 192.xxx.xx.xx, and append :4200 port for the angular server.
SERVER_URL=http://192.xxx.xx.xx:4200Tip
On windows you can check your ip via command ip config and look
for IPv4 address for your internet adapter
Now run the utility script to update the app config and start the app server
yarn nx run picsa-apps-app-native:serveRun the app from android studio either on an emulator or physical device
The app should live reload both on local network and device
Troubleshooting
If the app shows a Web Page Not Available screen then should first check the app is running locally. This can be done by visiting the url you specified in your local web browser, e.g. http://192.xxx.xx.xx:4200 .
If the app is running in a local browser then you should check that the SERVER_URL has populated as expected.
You can do this by checking the generated file at
apps\picsa-apps\app-native\android\app\src\main\assets\capacitor.config.json
The output should include a block with the url specified from your environment file
"server": {
		"androidScheme": "http",
		"cleartext": true,
		"url": "http://192.xxx.xx.x:4200"
	}
If the json configuration is as expected it may just be a case of reloading the app. If still not working seek out support.
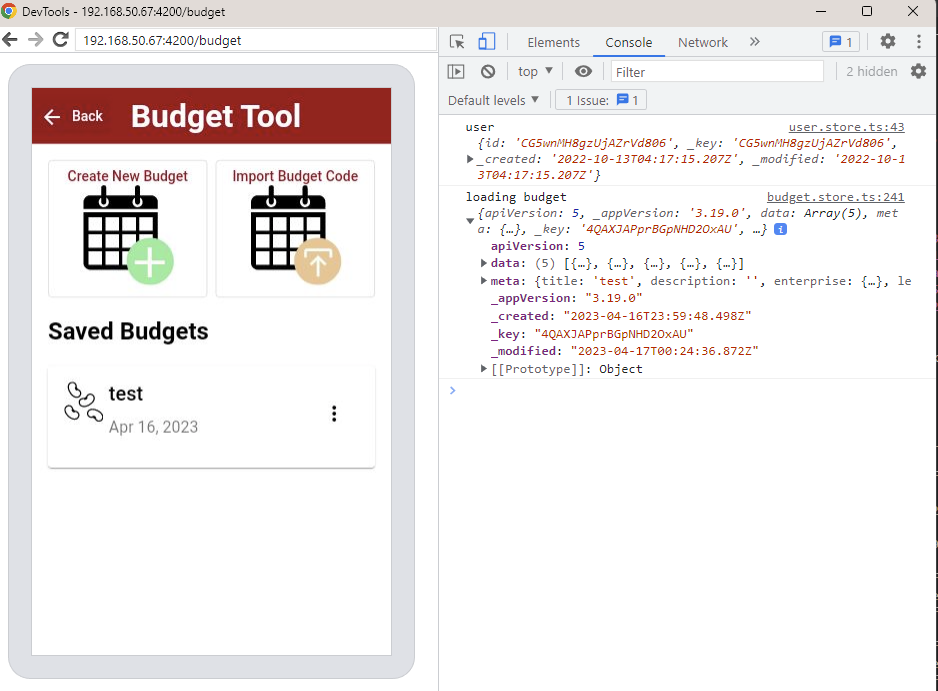
Inspecting Logs
Logs will appear in Android Studio logcat, or can be viewed in google chrome using the device inspector
chrome://inspect/#devices
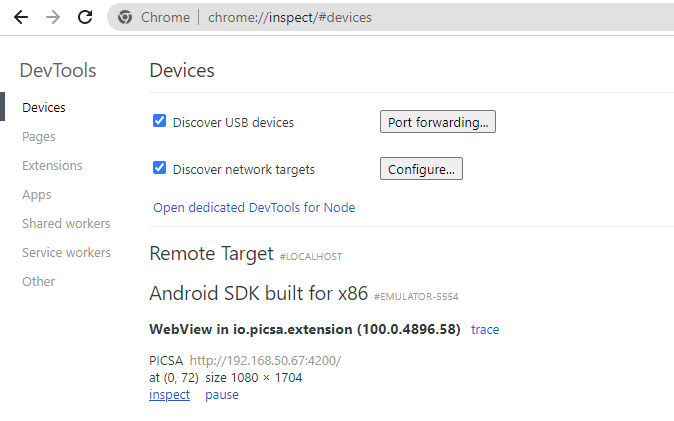
Clicking on inspect will launch devtools with access to full console logs
Troubleshooting
Main common issues are outlined in the Capacitor Android Documentation: https://capacitorjs.com/docs/android
There is also a dedicated troubleshooting page available at: https://capacitorjs.com/docs/android/troubleshooting
A few other specific issues are outlined below:
Android Emulator Crashes
If the emulator is crashing during operation view the android studio logcat logs and try to debug error messages on StackOverflow.
If the emulator crashes during startup (with no log messages shown) recommended troubleshooting steps:
- Ensure you have the latest version of the emulator SDK installed from Android Studio
- Try running emulator from command line with verbose logging and without Vulkan UI
emulator -avd "Pixel_API_33" -verbose -show-kernel -feature -Vulkan- Review troubleshooting advice at: https://developer.android.com/studio/run/emulator-troubleshooting
- Review issues raised at: https://issuetracker.google.com/issues?q=componentid:192727
Webcomponents
There may be issue bundling webcomponents when running on device server.
The current workaround is simply to temporarily disable the custom elements, by commenting out the defineCustomElements declarations
import { CommonModule } from "@angular/common";
import { NgModule } from "@angular/core";
// Import and register all custom elements for the module
// import { defineCustomElements } from '@picsa/webcomponents/loader';

import { DIRECTIVES } from "./generated";

// defineCustomElements(window);

@NgModule({
  imports: [CommonModule],
  declarations: [...DIRECTIVES],
  exports: [...DIRECTIVES],
})
export class WebcomponentsNgxModule {}